#header-inner { margin-left: auto; margin-right: auto;}
-->

Thursday, July 22, 2010

Fancy a game?

I have seen some of these memory games on the web and decided to have a go at some myself. They have been great for sweet customised gifts for my friends and their little ones.
I start by creating a petit carry bag in fabric and ribbons that I think will suit the person I have in mind.

I stamp paired images onto wooden discs. I picked up these discs on Ebay USA for a cheap price. The more you buy, the cheaper they are. The more you buy, the more games you can create! On the reverse side, I stamp the initials of who will be receiving the set.

I just adore the images of these whimsical woodland creatures and flowers, but any image could be used.


Tuesday, July 20, 2010

Sweet surprises!


I have to admit that at work I tend to be a little spoilt. All thanks to my friend Mrs Tiff - a fellow crafter, blogger and fan of all things vintage. Instead of passing on tedious messages to me, she prefers to pop sweet handmade surprises into my pigeon hole. These are just a small sample. Check out her amazing blog - http://www.mrstifflivingcreatively.blogspot.com/

Saturday, July 17, 2010

I am in love!


I stumbled upon a link to these pictures this morning. It is the most gorgeous thing I think I have ever seen. All I can say is... 'I want one!' Check it out...

Easy as 1 2 3

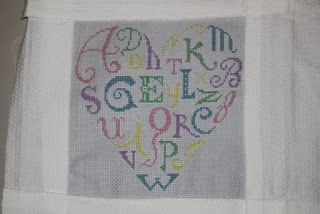
Completed in the wee hours of this morning, an alphabet cross stitch that I transformed into a cushion. Would look perfect in a nursery I think. I do have a few girlfriends with new babies...


PIECE OF CAKE

Inspired by something I saw at a baby shower a few weeks ago, I embarked on a new project...a nappy cake. I had my best pal, Olivia's, baby shower coming up and what a perfect opportunity to have a go at creating one.
1. Roll up nappies into sausages and bundle together in groups with rubber bands.

2. Create a circular bottom tier around a bottle of baby lotion.

3. Build a second tier. Fasten with string to keep nappies tight.

4. Create a final tier.

5. To create rose embellishments for the cake, I used baby socks. Start by rolling from the toe...

6. ...and secure by turning the end over. I finsished these ones off with pale greem ribbon bows.

7. Voila! Decorate with pretty pastel ribbon and a baby washer to fluff up the top. Good enough to eat!

LinkWithin

Related Posts Plugin for WordPress, Blogger...